You just unboxed your new massage gun. Exciting stuff.
Then you see them. Four, six, maybe eight different attachment heads staring back at you from the case. Round ones. Flat ones. Pointy ones. A weird fork-shaped thing that looks mildly threatening.
Which one do you actually use? And does it even matter?
Most people grab the ball attachment and use it for everything. That’s fine, I suppose. But you’re leaving performance on the table. Each attachment serves a specific purpose, designed for different muscle groups and tissue types.
As a fitness professional who uses massage guns daily with clients, I’ve tested every attachment type across hundreds of bodies. Some are absolute game-changers for specific areas. Others are marketing gimmicks you’ll never touch.
Let me break down exactly which attachments to use, where to use them, and why it matters for your recovery.
Why Attachment Shape Actually Matters
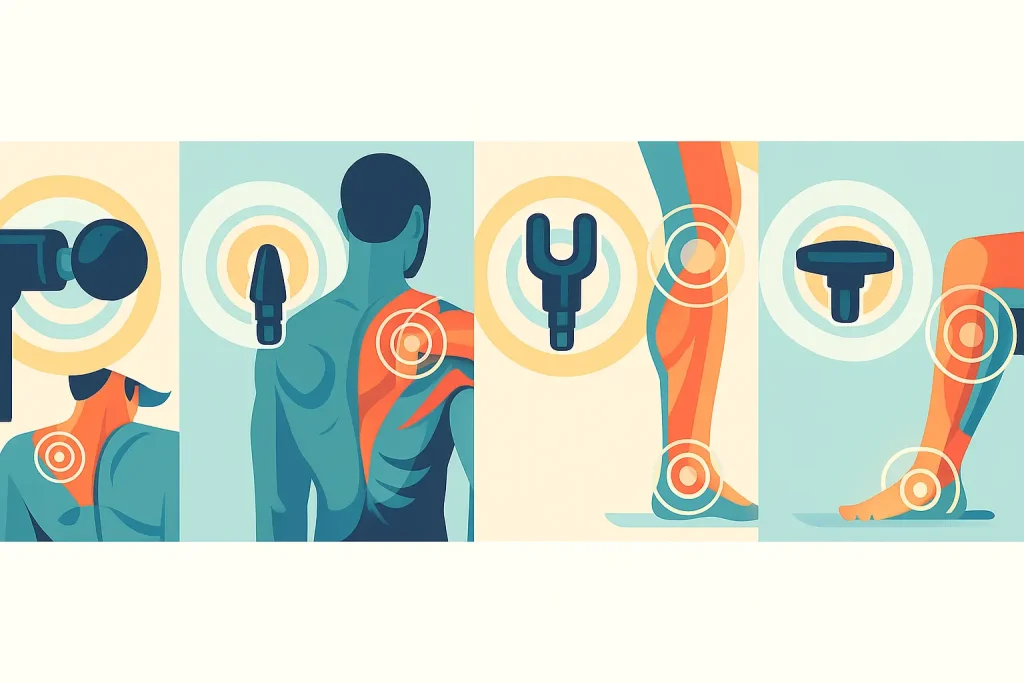
Different attachments distribute pressure differently across your tissue. It’s pure physics.
A small, concentrated attachment focuses force on a tiny area. This creates deep, intense pressure perfect for trigger points and small muscles. A large, flat attachment spreads that same force across a broader surface, delivering gentler, more diffuse pressure.
The shape also determines how the attachment interacts with your anatomy. Curved surfaces need curved attachments. Bony areas require cushioned, forgiving heads. Large muscle groups benefit from wide coverage.
Using the wrong attachment isn’t dangerous. But it’s inefficient. You’ll spend more time getting less benefit. Match the tool to the job and your recovery sessions become faster and more effective.
The Standard Ball Attachment (Round Head)
This is your workhorse. The attachment you’ll use 60% of the time.
The ball attachment works well on medium to large muscle groups. It provides moderate pressure dispersion without being too focused or too broad. Most ball attachments measure 1.5 to 2.5 inches in diameter.
Best for:
- Quadriceps (front thighs)
- Hamstrings (back thighs)
- Glutes (buttocks)
- Calves
- Chest muscles (pectorals)
- Upper arms (biceps and triceps)
How to use it:
Move slowly along the muscle belly. Spend 30 seconds to 2 minutes per muscle group. Work from origin to insertion, following the direction of muscle fibers.
For your quads, start near your hip and work down toward your knee. For calves, begin below your knee and move toward your ankle. The motion should feel smooth and systematic.
Don’t press hard. Let the device do the work. You’re not trying to bruise the muscle into submission. If you’re tensing up or holding your breath, reduce the pressure or speed.
The Flat Head (Dampener Attachment)
This attachment looks like a small platform or cushion. It’s your gentlest option, spreading force across the largest surface area.
The flat head excels on sensitive areas, bony regions, and anywhere standard attachments feel too aggressive. It’s also excellent for general relaxation work when you’re not targeting specific problem areas.
Best for:
- Shins and tibialis anterior
- Forearms
- Top of feet
- Areas close to bones
- IT band (iliotibial band on outer thigh)
- Anywhere that feels tender with other attachments
- General full-body relaxation sessions
How to use it:
The flat head works beautifully on the IT band. This notoriously tight connective tissue running down your outer thigh often feels painful with concentrated attachments. The flat head provides relief without the wince-inducing discomfort.
For shins, work vertically along the front of your lower leg. Go slowly. This area contains very little muscle padding, so even gentle attachments can feel intense.
Use the flat head for longer sessions when you want overall relaxation rather than targeted trigger point work. It’s perfect for evening wind-down routines.
The Bullet Attachment (Cone or Pinpoint Head)
Now we’re getting specific. This attachment looks like a small cone or cylinder with a rounded tip.
The bullet concentrates force on the smallest possible area. It’s designed for precision work on trigger points, muscle knots, and specific tension spots you can pinpoint with your finger.
Best for:
- Trigger points in shoulders and upper traps
- Neck muscles (use with extreme caution)
- Deep knots in back muscles
- Small stabilizer muscles around shoulder blades
- Plantar fascia (bottom of foot)
- Forearm tension points
- Areas around joints (not directly on joints)
How to use it:
Precision matters here. Don’t randomly run this attachment across large areas. Instead, identify specific tight spots. Press gently and hold for 10 to 15 seconds. Move to the next point.
For shoulder trigger points, those painful knots in your upper traps, the bullet attachment works wonders. Apply gentle pressure and breathe through it. You should feel the knot slowly release.
Never use this on bones, joints, or your spine directly. The concentrated force can cause bruising or pain. Stay on muscle tissue only.
Warning: use the lowest speed setting with this attachment. High speeds with concentrated pressure can cause tissue damage.
The Fork Attachment (U-Shaped or Two-Prong Head)
This weird-looking attachment has two prongs that straddle your spine or other bony structures. It’s brilliant when used correctly.
The fork allows you to work muscles on both sides of your spine simultaneously without jamming percussion directly into your vertebrae. The gap between prongs sits over bone while the prongs massage the muscles flanking it.
Best for:
- Erector spinae (muscles along spine)
- Upper back between shoulder blades
- Lower back muscles
- Along the Achilles tendon
- Both sides of your shin simultaneously
- Areas where you need to avoid bone
How to use it:
Position the fork so your spine or bone sits in the gap between prongs. Move slowly up and down, letting the prongs work the muscles on either side.
For lower back relief, sit or lie down. Place the fork on your lumbar spine with one prong on each side of your vertebrae. Work from your lower back up toward your mid-back. This feels incredible after long periods of sitting.
Along your Achilles, the fork straddles the tendon while massaging the calf muscles and ankle area. This is particularly helpful for runners dealing with tight calves.
Never press the fork directly into bone. The whole point is avoiding bone, not attacking it from both sides.
The Wedge or Thumb Attachment
Some massage guns include a wedge-shaped or thumb-like attachment. This mimics the pressure a massage therapist applies with their thumb.
The wedge provides moderate focused pressure, less intense than the bullet but more concentrated than the ball. It’s perfect for medium-sized muscles and areas that need more precision than a ball allows.
Best for:
- Forearm muscles
- Shoulder muscles (deltoids)
- Hip flexors
- Chest (pectorals) near the shoulder
- Upper back muscles
- Lower leg muscles
How to use it:
The wedge attachment shines on forearms. If you type all day, your forearm muscles get incredibly tight. The wedge lets you work along those muscles with appropriate pressure.
For hip flexors, lie on your back with knees bent. Position the wedge on the front of your hip where your thigh meets your pelvis. Use gentle pressure. This area can be sensitive but releases beautifully with patient work.
The angled surface allows you to follow muscle contours more naturally than a ball attachment. Experiment with different angles to find what feels best.
The Air Cushion or Soft Head
This attachment looks puffy or inflated. Some are made from softer rubber or foam materials.
The cushioned head provides the gentlest possible percussion. It’s ideal for sensitive individuals, beginners, or extremely tender areas. Think of it as training wheels for massage gun use.
Best for:
- Sensitive individuals new to massage guns
- Areas that feel too tender with other attachments
- Neck and trapezius muscles (upper shoulders)
- Post-injury recovery (cleared by medical professional)
- Elderly users or those with fragile tissue
- Face and jaw muscles (if your device supports facial use)
How to use it:
Start with this attachment if you’re new to percussion therapy. It helps you learn proper technique without risking tissue damage from more aggressive heads.
For neck tension, use this attachment exclusively. The neck contains delicate structures that don’t tolerate aggressive percussion. Light pressure with the soft head on the sides and back of your neck can provide relief without risk.
Never use any attachment on the front or sides of your neck near major blood vessels and airways.
Specialty Attachments: Are They Worth It?
Some premium massage guns include additional specialty heads. Do you need them?
Spade or Shovel Attachment
This looks like a small shovel or spade. It’s designed for scraping techniques along larger muscles. Useful for glutes, thighs, and back, but not essential. The ball attachment handles these areas fine.
Metal Attachments
Some brands offer metal versions of standard shapes. They claim better energy transfer. In practice, most people find them too harsh. Stick with rubber or foam unless you specifically prefer harder contact.
Extra Large Heads
Oversized attachments for maximum coverage on very large muscle groups. Helpful for big athletes with massive legs or backs. Average users don’t need them.
Body Part Breakdown: Your Quick Reference Guide
Let me give you the fastest path to results. Here’s what I use for each major body area.
Upper Body
Neck and traps: Soft cushion or flat head. Lowest speed. Extreme caution. Side and back of neck only.
Shoulders: Ball attachment for deltoids. Bullet for trigger points in upper traps.
Chest: Ball attachment across pectorals. Stay on muscle, avoid breast tissue.
Upper back: Fork attachment along spine. Ball for broader areas. Bullet for specific knots between shoulder blades.
Lower back: Fork attachment along spine. Ball for broader muscle work on sides of back.
Arms: Wedge for forearms. Ball for biceps and triceps.
Lower Body
Glutes: Ball attachment. This area can handle significant pressure.
Hip flexors: Wedge or bullet, depending on how targeted you want to be.
IT band: Flat head. This will thank me later. The IT band hurts with concentrated attachments.
Quads: Ball attachment. Cover the entire front thigh systematically.
Hamstrings: Ball attachment. Work from glutes down toward knee.
Calves: Ball for muscle belly. Fork along Achilles tendon area.
Shins: Flat head only. Very sensitive area.
Feet: Bullet for plantar fascia. Flat head for general foot relief.
Common Attachment Mistakes to Avoid
Using the bullet everywhere. It’s tempting because it feels more “therapeutic.” But concentrated pressure on large muscles is inefficient and can cause bruising.
Ignoring the flat head. People think it’s too gentle to be effective. Wrong. For IT bands, shins, and sensitive areas, it’s the only logical choice.
Going too fast with aggressive attachments. High speed plus concentrated pressure equals tissue damage. Start slow, especially with the bullet.
Using the fork incorrectly. The gap should sit over bone, not beside it. Straddling your spine means the prongs hit muscle on either side, not that one prong rides along your vertebrae.
Never changing attachments. The ball works for most things, but you’re missing out on targeted relief in specific areas that need different approaches.
Do Expensive Attachments Perform Better?
Premium massage guns often include higher-quality attachments made from better materials. They’re more durable, feel smoother, and maintain their shape longer.
Budget attachments work fine initially but may degrade faster. The rubber hardens, foam compresses, or plastic cracks. If you use your massage gun daily, quality attachments are worth the investment.
That said, attachment shape matters far more than material quality for effectiveness. A basic rubber ball attachment from an affordable brand works essentially the same as a premium version.
Focus on having the right shapes for your needs rather than obsessing over material quality.
Building Your Essential Attachment Kit
If you’re buying a massage gun, make sure it includes at minimum:
- Ball attachment (absolute essential)
- Flat head (crucial for sensitive areas)
- Bullet or cone (trigger point work)
- Fork attachment (spine-adjacent work)
These four cover 95% of your needs. Any additional attachments are bonuses, not necessities.
Some massage guns come with six, eight, or more attachments. That’s fine, but don’t feel overwhelmed. Start with the basics. Master those before experimenting with specialty heads.
The Bottom Line on Massage Gun Attachments
Does attachment choice matter? Absolutely.
Will using the wrong one hurt you? Probably not, unless you’re using the bullet on high speed everywhere or pressing the fork directly into bone.
The real benefit comes from matching the attachment to the tissue you’re treating. Large muscles get broad attachments. Trigger points get focused ones. Sensitive areas get gentle options. Bony regions get the fork.
Master four attachments and you’ll handle any recovery need. Get comfortable with the ball, flat head, bullet, and fork. Everything else is gravy.
Your massage gun is only as effective as your understanding of how to use it. Take five minutes to experiment with different attachments on various body parts. You’ll quickly develop intuition for what works where.
Stop grabbing the same attachment every time. Your muscles deserve better than one-size-fits-all treatment. Mix it up based on what you’re targeting, and your recovery quality will improve immediately.
Smart tool selection makes you a better athlete and a happier human.
Ready to invest in a quality massage gun with the right attachments for your needs? Check out our curated collection of professional-grade massage guns featuring comprehensive attachment sets designed for serious recovery.